


Javascript has seen a huge growth in usage and functionality, from being a scripting language used for websites, to server-side programming, and much more. NodeJS, or Node for short, is a runtime environment for Javascript, enabling us to build server-side applications with it.
Different languages provide drivers for different databases. Database drivers are programs that guide communication between databases, like Postgresql, Oracle, NoSql, MongoDB, or MySQL.
In This tutorial, we will learn how to Use MySQL with Node.js.
Requirements
You need nodejs installed to test this out, and a MySQL setup. The writer expects that the reader has some knowledge of MySQL and how to use nodejs.
Project setup
To get started first run the npm init command, to initialize a nodejs project. Follow the prompts.
Install dependencies
Install the mysql driver for nodejs using the command below:
npm install --save mysql2
Note that we are using mysql2 client for Nodejs and not mysql npm package. The difference is the additional features it offers and most importantly. It is free from native binding and so installation and usage will be painless.
Datebase setup
For the purpose of our learning, we will setup a local instance of a mysql database server. And setup a database. We used PhpmyAdmin for this.
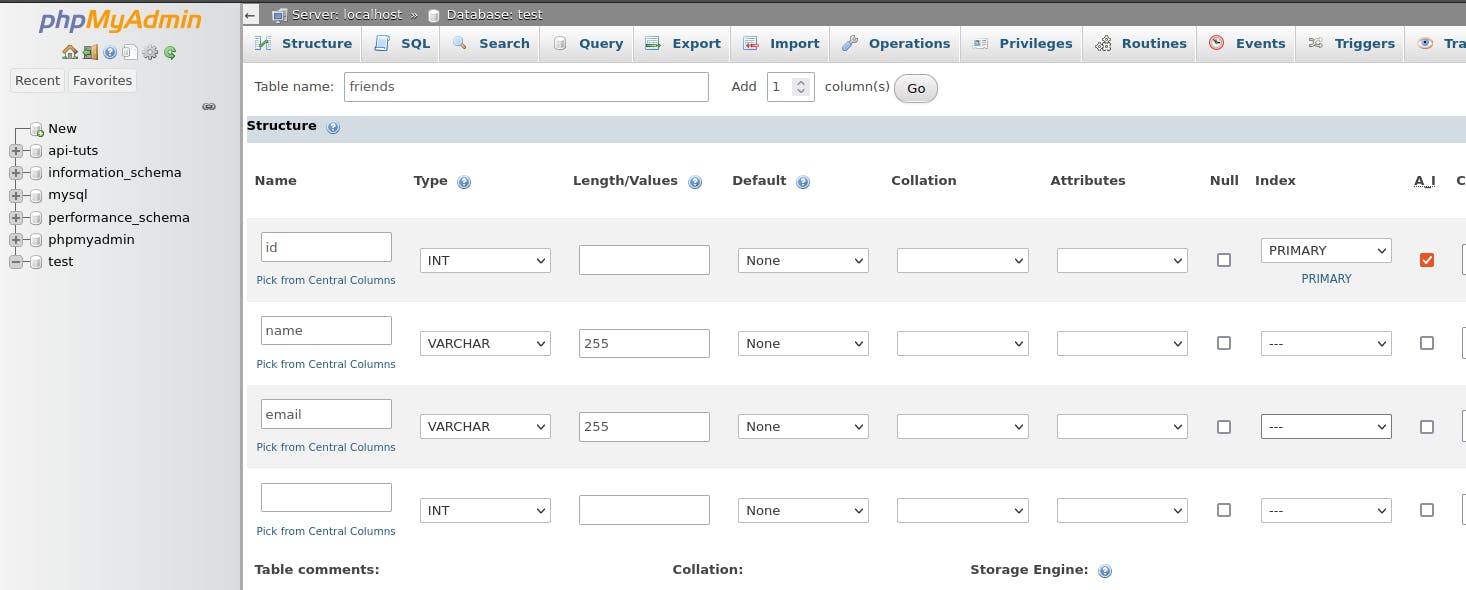
As seen in the above image we created a table called friends with some data columns to illustrate the use of the mysql javascript package.
Connect to mysql database
The mysql2 JavaScript package provides a createConnection method for creating connections with a database. The createConnection method takes as argument, some values necessary for the connection to occur.
Let's explain it with a simple example. Consider the code below
// import mysql package
const mysql = require('mysql2');

// create the connection to database
const connection = mysql.createConnection({
  host: 'localhost',
  user: 'root',
  database: 'test'
});
The mysql.createConnection method returns a Connection object that can be used later to perform some database operations. The method expects a connection string or an object containing connection parameters like host, user, database, password, etc most of which are optional.
Connection Pooling
Connection pooling is a technique used to reduce the number of connections to the MySQL server by reusing previous open connections. In this way, your queries will run faster since establishing a new connection is avoided. Consider the code below:
// get the mysql client
const mysql = require('mysql2');

// Create the connection pool. The pool-specific settings are the defaults
const pool = mysql.createPool({
  host: 'localhost',
  user: 'root',
  database: 'test',
  waitForConnections: true,
  connectionLimit: 10,
  queueLimit: 0
});
The value returned can then be used for other database operations.
The mysql2 package also supports promises, so we will use promises instead of callbacks
Database operations
Using Promises
The mysql2 package supports promises that works well with async await.
// Get the client with promises
const mysql = require("mysql2/promise");

async function run() {
  // create the connection
  const connection = await mysql.createConnection({
    host: "localhost",
    user: "root",
    database: "test",
  });

  const [rows, fields] = await connection.query("SELECT * FROM `friends`");
  console.log(rows);
  console.log(fields);
}

run();
As part of the package, we have a .promise() method for our connections, which allows us to upgrade existing nonpromise MySQL codebase to use promises.
// get the client
const mysql = require('mysql2');
// create the connection
const con = mysql.createConnection({
  host:'localhost',
  user: 'root',
  database: 'test'
});

con.promise().query("SELECT * FROM friends")
  .then( ([rows,fields]) => {
    console.log(rows);
  })
  .catch(console.log) // Error handling
  .then( () => con.end());
You can close a connection with the .end() or .close() method on a connection object.
Prepared or Parameterized Statements
This database feature is used to pre-compile our SQL code, seperating it from data. We are more likely to use prepared statements for sake of efficiency and security. To use prepared statements with mysql driver consider the code below:
const mysql = require("mysql2/promise");

mysql.createConnection({
  host: "localhost",
  user: "root",
  database: "test",
}).then(async (con) => {
  const [result] = await con.execute("SELECT * FROM friends WHERE email = ?", ["amyhart@example.com"])
  console.log(result);
  con.close();
}).catch(err => console.err(err));
The above example makes use of positional parameters; values passed when using positional parameters must be an array. While in named parameters values passed must be in a key-value form (i.e an object). When using named parameters you'll have to enable its use else you get an error as seen in the figure below

To correct this, we enable the use of named placeholder by passing the option namedPlaceholders: true to the createConnection method of mysql.
mysql.createConnection({
  host: "localhost",
  user: "root",
  database: "test",
  namedPlaceholders: true
}).then(async (con) => {
  const [result] = await con.execute("SELECT * FROM friends WHERE email = :email", {email: "amyhart@example.com"})
  console.log(result);
  con.close();
}).catch(err => console.error(err));
Conclusion
To conclude, we talked about mysql and nodejs, making database connections with the package, connection options and connection pooling, and we also saw how to use prepared statements and promises with the package.
I hope this article helped you see how to use mysql with nodejs easily.